
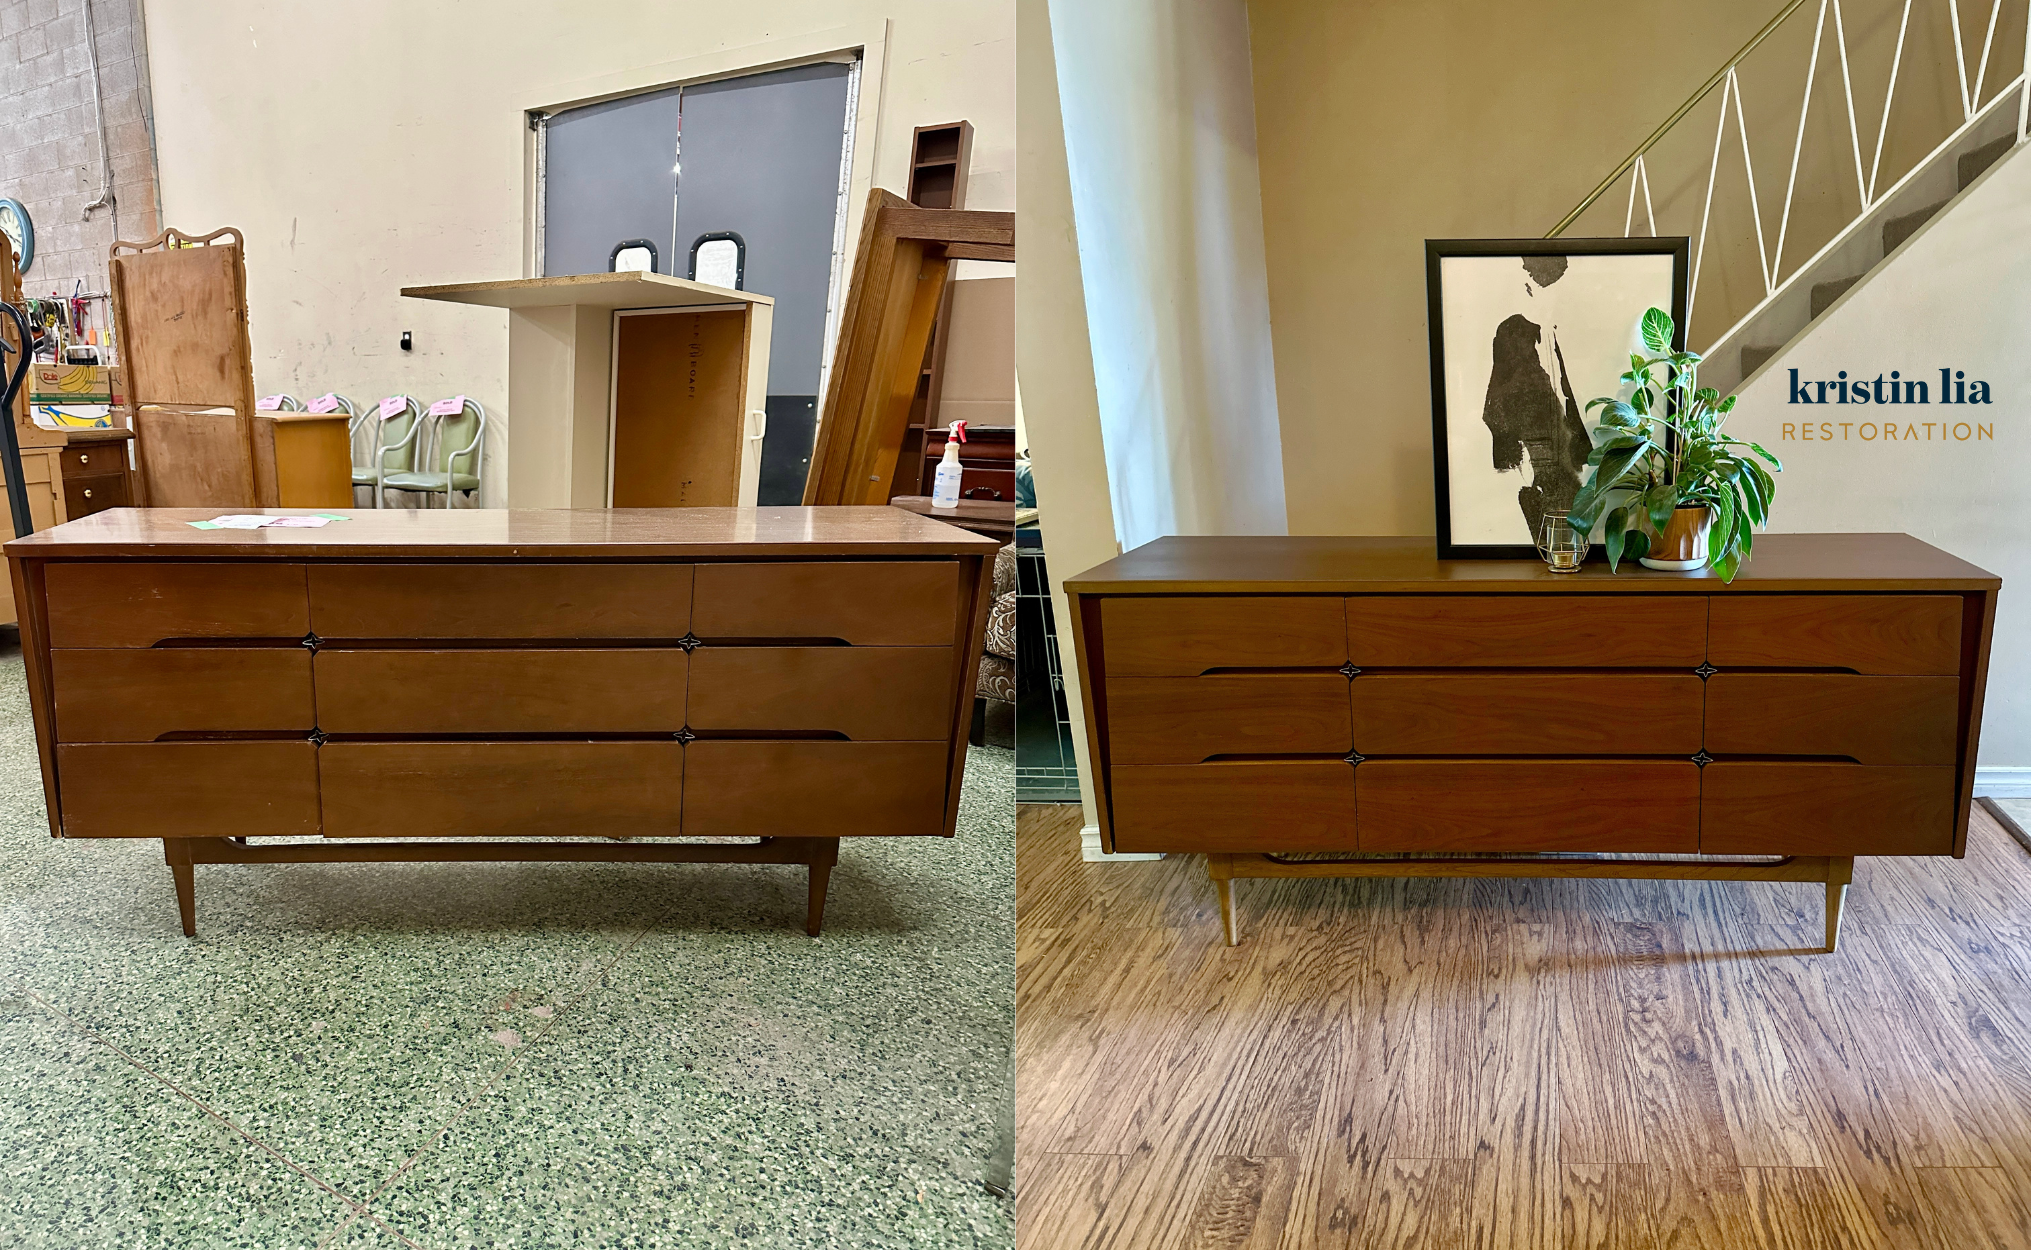
The moment I saw this Mid Century Modern Kroehler 9-drawer dresser, I was in love with how unique it was. The decorative bits, the curved sides of the drawers and the clean design really drew me in.

And look at it now!

Materials:
- Wood filler: Bondo
- Cleaner (non wood surfaces): Rustoleum’s Krud Kutter
- Wood sealant: Osmo Oil Stain in Havanna (3541)
- Wood sealant: Osmo Polyx-Oil Clear in Matte
- Canadians – For 10% off Osmo products, send me an email (KristinLia@rogers.com) with the products you love!
- Paint accent: Country Chic Paint – Leather Bound
Tools used:
- DeWalt 5″ random orbit sander, variable speed
- DeWalt cordless vacuum
- Country Chic Paint 1.5″ oval brush
- Elite small round (ring) brush
- Staalmeeester 10cm microfibre roller
- Osmo microfibre roller
- Osmo roller tray
- Osmo Superpad
- Osmo pad holder
- Tack cloth
- Bar rags
- Putty knife
- Safety gear- respirator, ear protection, anti-vibration gloves
- 2000 grit sand paper and sanding block
HERE ARE STEP BY STEP INSTRUCTIONS ON HOW I TRANSFORMED THIS KROEHLER 9 DRAWER DRESSER:
Repairing damaged areas & Disassembling
Here’s how I started on it:
 truly thought that drawers were maple
 taped the edges of the spots I was going to repair with camouflage
 MAKE SURE TO WEAR A RESPIRATOR TO PROTECT YOUR LUNGS
 &
& mixed equal parts of the Bondo components and used a putty knife to generously apply
 while that dried, I used a ratchet to remove the nuts that held the bottom frame in place
 tried to figure out my design plan
Next up is sanding and I can’t wait to see what’s under that existing finish!
Sanding & Clean up with Krud Kutter
It’s time to sand and see what’s under that finish! I love sanding. Something about it reminds me of giving it a new start. Removing the old and looking ahead.
Here’s how I applied it:
 started by putting on my safety gear- Suadex safety shoes, ear protection, respirator from Lee Valley and anti-vibration gloves
 for the areas I had applied Bondo, used 80 grit with my DeWalt random orbit sander to smooth out
- to remove the finish on all other areas (drawers, sides, edges, bottom frame), started with 100 grit on medium speed
- for the laminate top, used 150 grit to scuff sand; also used 150 to smooth out the wood areas
 when done, used my DeWalt cordless vacuum to remove as much of the sanding dust as I could
 for the non-wood areas, I used Rustoleum’s Krud Kutter to give the top, inside of the frame and the drawers (inside and out) a good clean
 rinsed all the surfaces with a clean rag and new water
The wood on the drawers turned out to be walnut- my favourite!! Now I need to figure out a whole new design plan.
Testing Osmo Finishes & Choosing Paint Colour
I was truly at loss as to what finishes I wanted to use. When I don’t have a clear design plan, my go-to is always to test.
Here’s how I tested finishes:
- marked out 4 squares using Elite washi tape
- Tested the following wood sealants from Osmo:
- Tobacco Oil Stain
- Havana Oil Stain
- Polyx-Oil Tints in Black
- Polyx-Oil Tints in Honey
 used a ring brush to apply because it’s a closer match in grams to the amount of product the microfibre roller will leave on the surface
 let dry overnight
- removed the tape
 decided on Osmo’s Havana Oil Stain
 did a couple of mock-ups to decide on the colour for the paint accent
 chose Country Chic Paint’s Leather Bound
I’ll apply the paint accent first. Stay tuned!
How to apply Country Chic Paint accent
With the finishes picked, it was now time to apply the paint accent. For the accent, I chose Country Chic Paint’s Leather Bound.
Here’s how I created the paint accent:
- marked out the areas using Elite washi tape
- lined a small paint tray with foil, stirred the paint and poured into the tray
- to apply the paint to the edges, I used a 1.5” Country Chic Paint oval brush and a Staalmeester microfibre roller for the top, flat surface
- in between all three coats, lightly sanded with a 400 grit foam pad to make a smooth surface free of dust (and dog hair
 )
) - used a damp cloth to remove the dust
 for the third coat, used a flashlight
  to check I didn’t miss any spots
 typically I wouldn’t do a fourth coat but I noticed a little discolouration and wanted to fix it
- when dry, removed the tape
I can’t wait to try out this Osmo Oil Stain on the wood surfaces!!
Application of Osmo Oil Stain
I haven’t used Osmo’s Oil Stain yet and I was so excited to try it out! I chose the shade Havana.
Here’s how I applied the Oil Stain:
- protected the paint accent with Elite washi tape in delicate (called Sensitape); this ensures that paint won’t lift when I remove it
 used a tack cloth to remove any dust or dog hair before I applied the stain
 poured the stain into the tray
- for the legs and edges, applied with an Elite ring brush
 for the flat surfaces (drawers, sides), applied with a microfibre roller
- let dry for 12 hours
- lightly sanded all oil stained surfaces with 400 grit foam pad and removed the dust with a tack cloth
 decided to do a second coat on the bottom frame and top edges to make them a little more cohesive
- again let dry for 12 hours
- lightly sanded all oil stained surfaces with 400 grit foam pad and removed the dust with a tack cloth
If you want a more transparent finish with the oil stain, you just have to wipe the excess with a cloth or non-abrasive pad. It’s so versatile that way!
Application of Osmo Polyx-Oil (using a roller)
The Oil Stain from Osmo does need to be sealed. To do this, I chose Osmo Polyx-Oil Clear in a matte finish. Country Chic Paint does have a built-in topcoat but for extra durability, I also seal it with the hardwax oil.
Here’s how I sealed all the surfaces:
- removed the Elite delicate washi tape
 stirred the Polyx-Oil and poured into the tray
- for the legs and edges, applied with an Elite ring brush
- for the flat surfaces (drawers, sides), applied with a microfibre roller
- let dry overnight but only 8-10 hours requires
- lightly sanded all surfaces with 400 grit foam pad and removed the dust with a tack cloth
- touched up a tiny spot with paint
- the secret to a durable Osmo finish is to slowly build it; because of this, I applied the second coat
- let dry 8-10 hours
The finish has come to life! The final step for sealants is buffing in the last coat of the hardwax oil.
How to apply Osmo Polyx-Oil (buffing)
The last step when applying the Osmo finish is to buff in the Polyx-Oil.
Here’s how I buffed:
- lightly sanded all surfaces with 400 grit foam pad and removed the dust with a tack cloth
 started by drizzling some of the Polyx-Oil onto the surface
 using an Osmo Superpad on a pad holder, did gentle circles with the oil until it was all absorbed into the surface
 finished with long, even strokes with the grain
- let dry overnight
It will be all about the finishing touches tomorrow!! I’m loving how this one is all coming together.
Finishing Touches
I just loved using Osmo Oil Stain for this 9-drawer Kroehler dresser! Pairing it with Country Chic Paint’s Leather Bound really helped create a really cohesive piece.
Here’s how I finished off this dresser:
- 👴🏻 Used Grandpa Ernie’s sanding method for all the wood surfaces for a “smooth like butter 🧈” finish; let me know if you need a further explanation

- removed the tape
- reinstalled the base
- reinstalled the decorative pieces
- put the drawers back into their proper location
This Kroehler dresser gave me a few surprises and I’m so happy with how it all came together!! Now, it’s ready for a brand new life 🙂


I'd love to know what you think!