
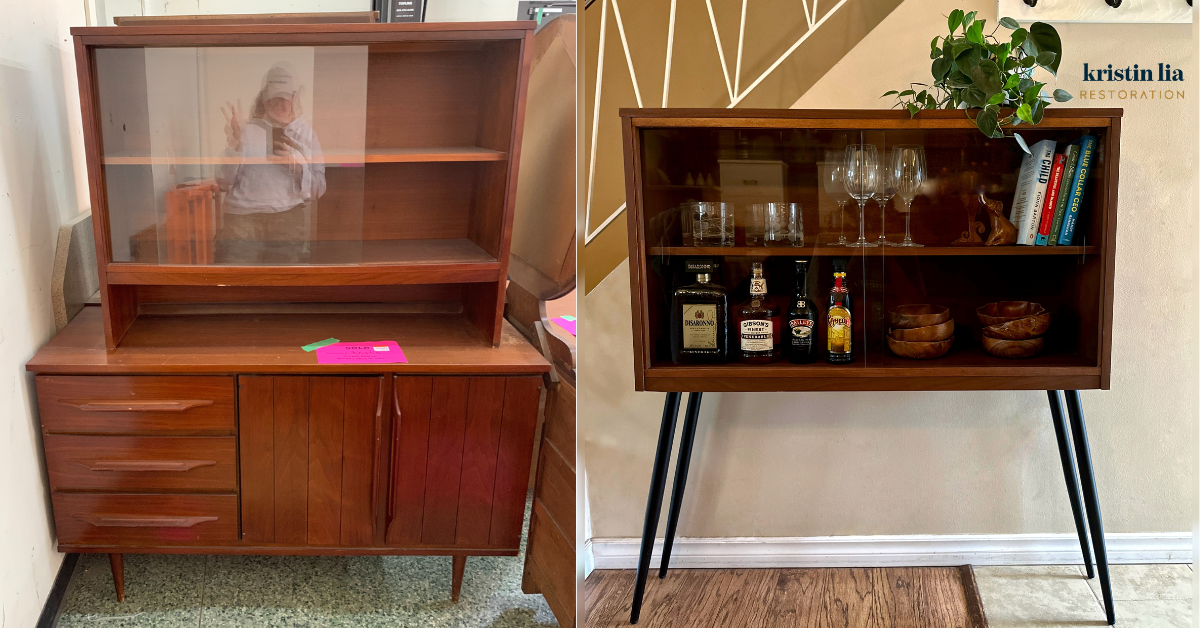
I’m embarrassed to admit that this hutch top sat in my basement for almost a year before I finally got to it. I loved seeing that grain emerge – I completely forgot how nice it would be (I had previously refinished the bottom buffet part!)
I love being able to take these tops and repurposing them 🙂

Materials:
- Wood sealant: Osmo Polyx-Oil Tints in Amber
- Wood sealant: Osmo Polyx-Oil Clear in Matte
- Canadians – For 10% off Osmo products, send me an email (KristinLia@rogers.com) with the products you love!
Tools used:
- Dewalt 5″ random orbit sander, variable speed
- Dewalt jigsaw
- Bora guide
- Dewalt cordless vacuum
- Elite small round (ring) brush
- Elite washi tape
- Osmo microfibre roller
- Osmo roller tray
- Osmo Superpad
- Osmo pad holder
- Tack cloth
- Safety gear- respirator, ear protection, anti-vibration gloves, Suadex safety boots
- 2000 grit sand paper and sanding block
How I refinished this piece:
*When scrolling through on your desktop, click on the black slide to start and pause the videos*
- 📌 removed the backboard with a tack lifter
- 🪚 cut the sides down using my Bora guide as a fence
- 🪛 disassembled as much as possible to make sanding/ refinishing a lot easier
- 🏝️ sanded with my Dewalt random orbit sander starting with 100 grit on medium speed; smoothed with 150
- 🤚🏼 hand sanded some hard-to-reach spots
- 📌 removed dust with a tack cloth
- 🪵 applied Osmo Polyx-Oil Tints in Amber for the 1st coat; used a @makoelite brush and microfibre roller
- 💨 let dry for 24 hours
- 🪚 using spare wood and glue, cut boards to size as the base for the new legs
- 🏝️ sanded with a 400 grit foam pad in between coats to ensure a smooth surface
- 2️⃣ for coat 2, used the same application method to apply Osmo Polyx-Oil Clear; let dry 8-10 hours
- 🦵🏼 installed the new legs (then one set fell off 🤦🏻♀️) so resecured with screws
- 3️⃣ buffed in the coat 3 of Polyx-Oil using an Osmo Superpad
- 👴🏻 finished with Grandpa Ernie’s sanding method
- 🪛 reassembled all the pieces
Giving these tops a new life as display cases is one great way to keep them out of the landfill!
Here are some other in-depth videos outlining the process – step by step with my daily commentary!
PART ONE
PART TWO
PART THREE


I'd love to know what you think!